If you're creating an invoice that's similar to one you've already sent, you can skip adding all the details again and make a copy of an existing invoice.
When you want to ask for payment, it’s time to send an invoice. Go to Money in, tap + and Create invoice to get started.
Pick your customer – keep track of who you’re selling to and who owes you money. Choose a customer in the Customer field, or tap + to add a new customer.
Check your payment terms – this lets your customers know when their payment is due. The due date is remembered for each customer. You can also change your invoice number here. If you change it, future invoice numbers will continue on from the new number.
Add what you’ve sold – add the products or services you’ve sold, including the quantity and price. For example, you sell 2 hours of consulting at $200 an hour or 3 boxes of flowers at $150 per box. If you're offering a discount, tap the three dots next to the item and add the discount.
Add extra information – you can send your customer a note to add a personal touch or give them more details about their invoice.
Once you’ve finished putting together the invoice, tap Save. Choose to send it now or save it for sending later. If you use Tap to Pay, you can take payment.
Has your customer made a payment? Record their payment.
Send automatic payment reminders to a customer
Invoice reminders only work for invoices sent directly from the app by tapping Email from app when saving the invoice. Invoice reminders won’t be sent for invoices that have only been shared as PDFs or sent as a link. For example, if you've sent it through your email or in a text message.
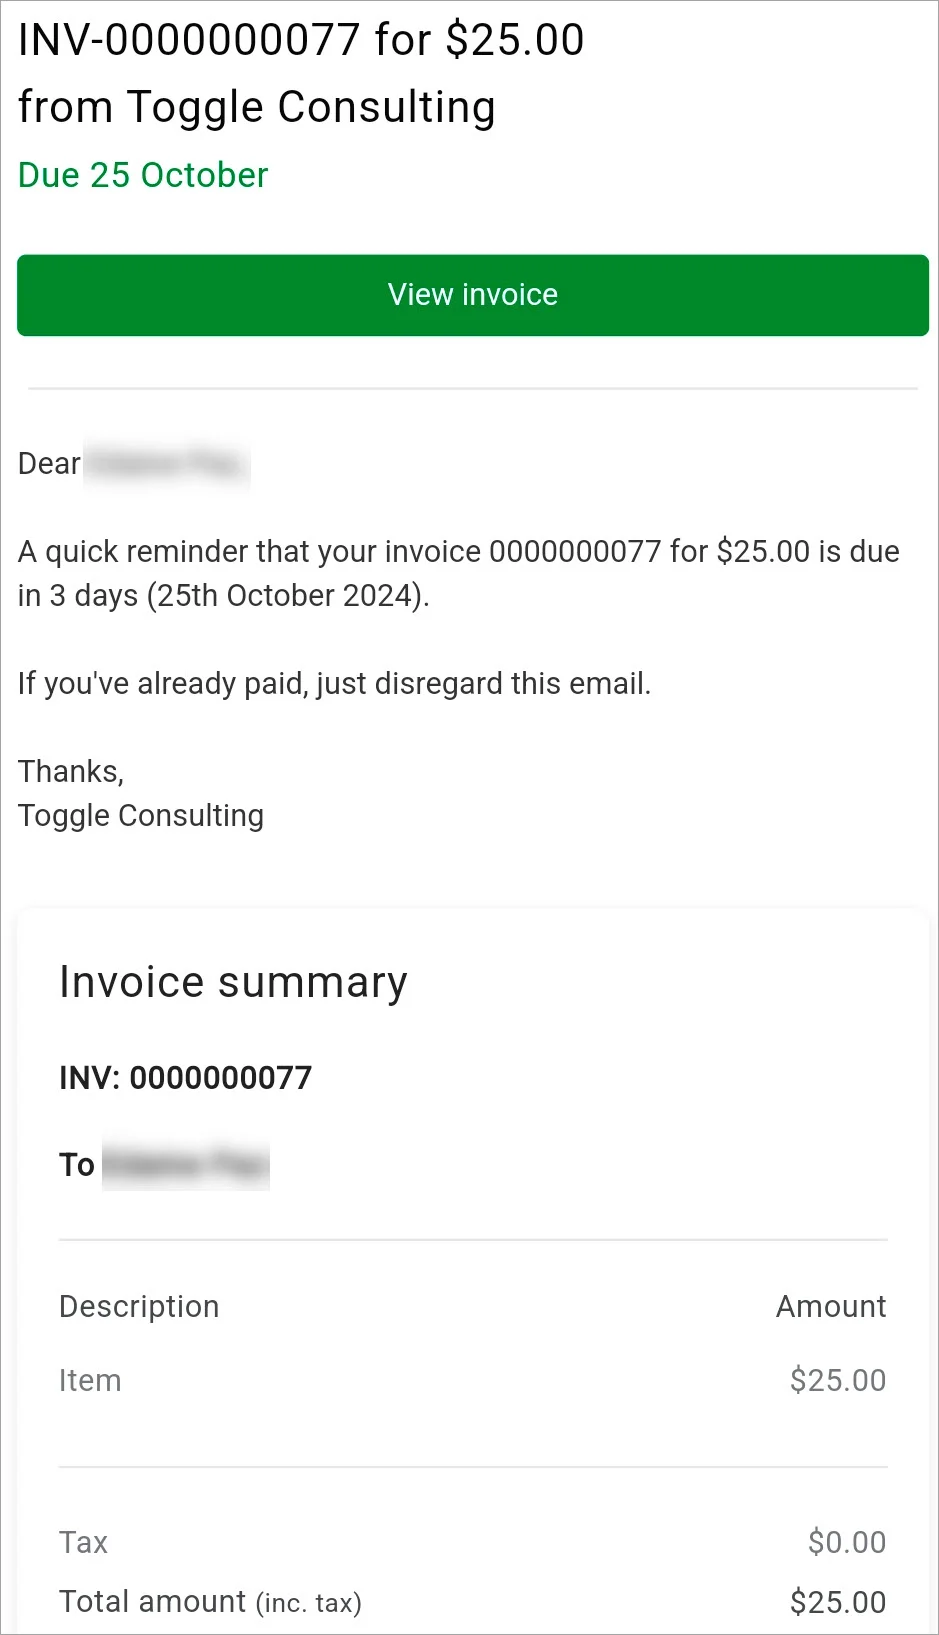
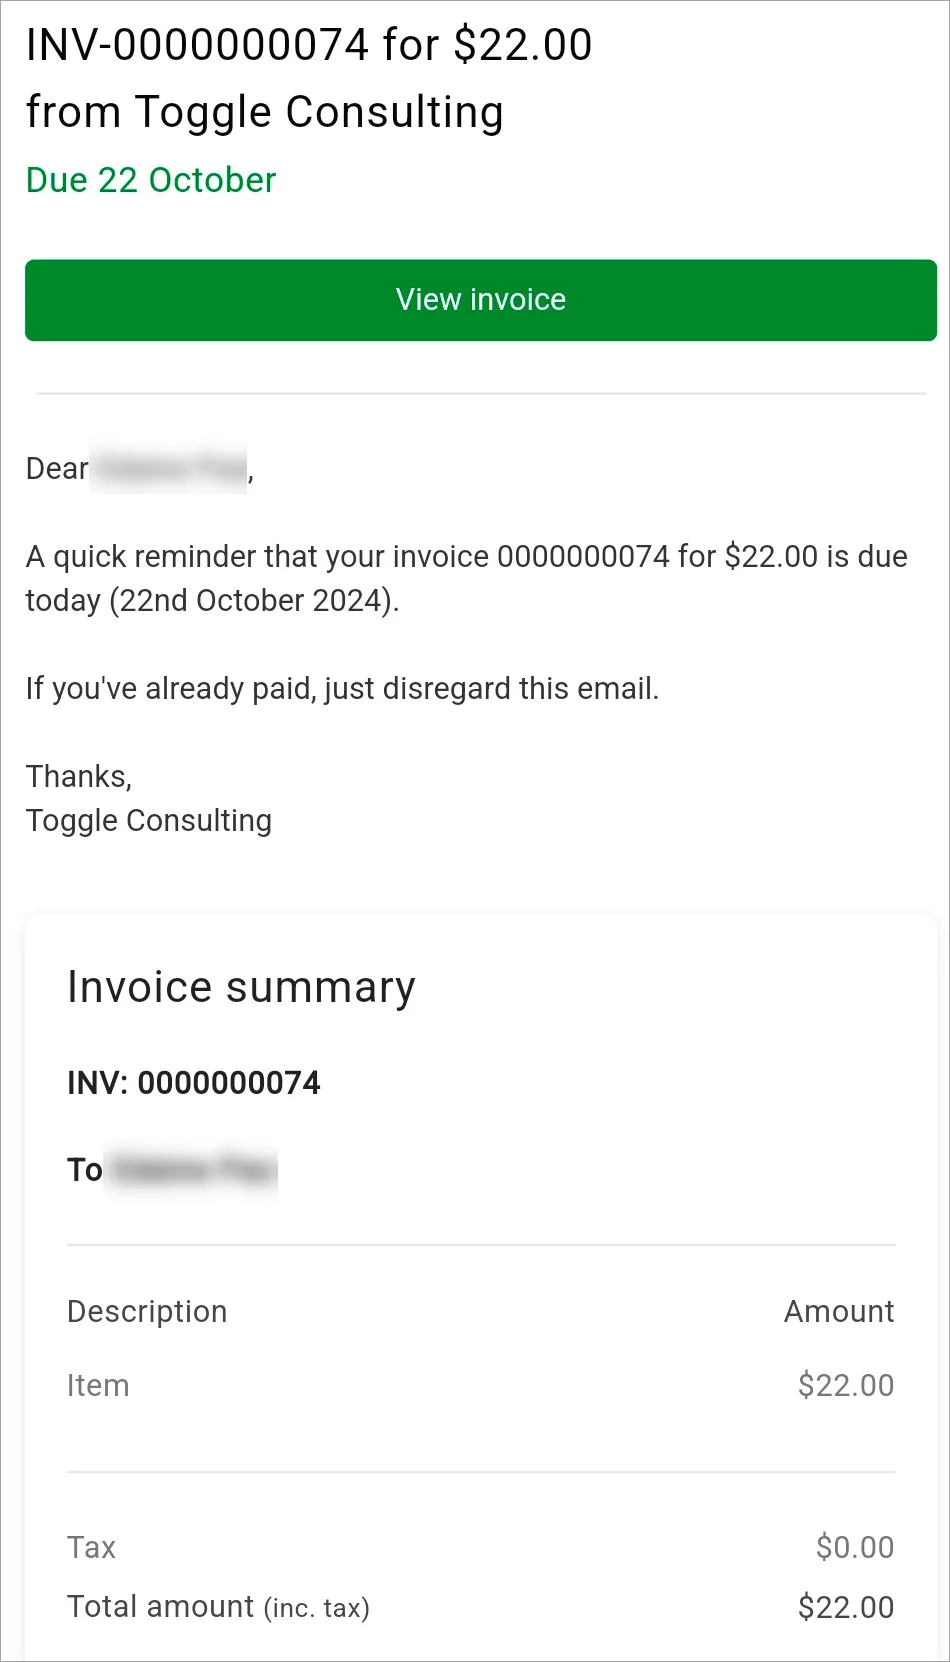
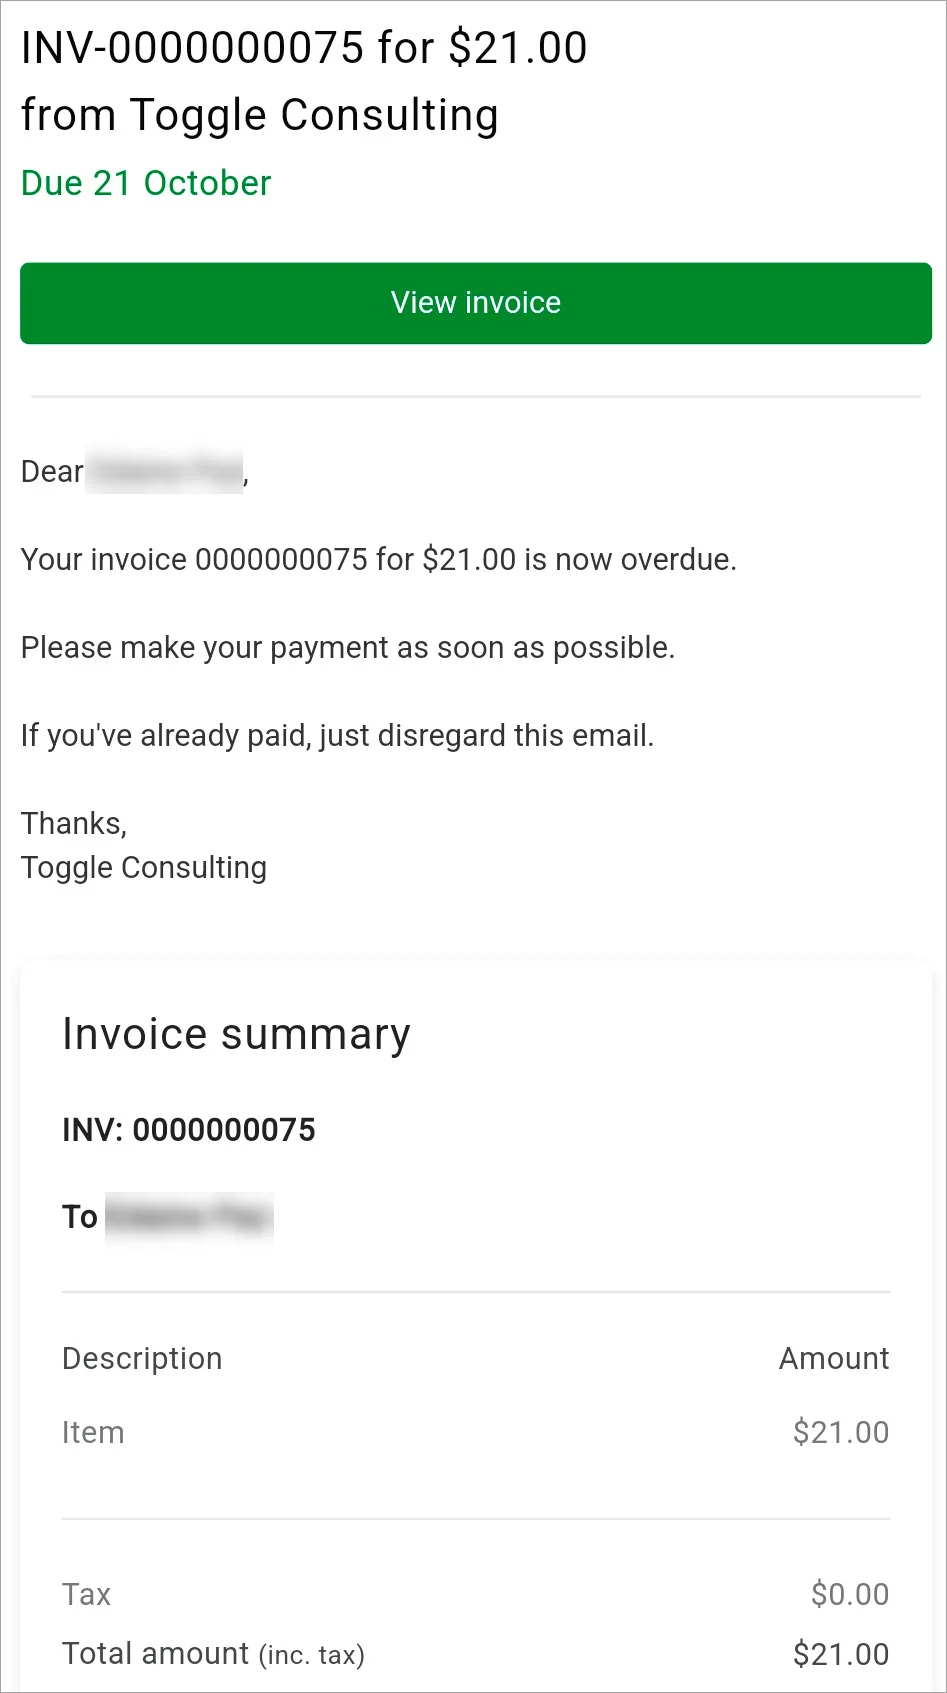
Get paid faster by automatically reminding customers to pay their invoices. Once you’ve turned on payment reminders for a customer, they’ll receive an email 3 days before an unpaid invoice is due, then another reminder on the due date and finally when it’s overdue by 1 day.
Go to Money in and tap to open a customer’s unpaid invoice, then tap Edit or create a new invoice for them. Tap Payment terms and select the option Send payment reminders. When you tap Save, this customer will receive payment reminders.
To turn off payment reminders for this customer, repeat these steps and deselect the Send payment reminders option.
What reminder emails look like
First email (3 days before due date)

Second email (on due date)

Final email (1 day past due date)

Adding an item
Add items to invoices, so your customers understand what they’re paying for.
In the invoice, tap Add item.
Choose the item and tap Add to invoice.
If you're selling something that you haven't sold before, tap the plus sign (+) and fill in the details, then Add to invoice. You can save the item if you think you’ll use it again, or just add it to this invoice by turning off Save to products and services.
After you’ve added an item, you can:
change the quantity of it, like 2 hours of consulting, or include a decimal place, like 1.25 kg of fertiliser.
add a discount to it, like 5% off. Just tap the three dots (…) next to the item, tap Add Discount and enter the discount as a percentage.
change the details of it for that invoice, like the price, name or tax code. Just tap the three dots (…) next to the item, tap Edit and change the details.
Reusing a note to your customer
You can save and reuse the invoice notes that you share with your customers. Using a saved customer note is ideal for when you regularly add the same or similar message in customer notes across invoices.
To add a saved note to an invoice, scroll down to Note to customer, tap Saved customer notes, find the note and tap Use note.
Saved notes can be used like a template, so you add them and then change the message on the invoice for that specific customer and sale.
Resending an invoice
Email it – go to Money in, scroll down and tap View all invoices then select the invoice. Tap More and tap Email invoice. You can change who you’re sending it to and what’s written in the email. Tap Send when you’re ready to email it.
Share it as a PDF – go to Money in, scroll down and tap View all invoices then select the invoice. Tap More, then Share PDF. You can share it through email or any of your text messaging apps.
Share a link to it – go to Money in, scroll down and tap View all invoices then select the invoice. Tap More, then Share link and choose the messaging app you'll use to send the link. You can change what's written in the message. Add the customer and send it when you're ready.
Previewing an invoice
After you've saved an invoice, you can preview it as a PDF. Go to Money in, scroll down and tap View all invoices, then select the invoice and tap Preview invoice.
If you want to share it, you can choose to share it from the preview as a PDF or link.
Send an invoice in an SMS
You can send an SMS message with a link to the invoice, or add the PDF invoice to the message.
While you're sending the invoice – after you've tapped Save, tap Share. On the invoice preview, choose if you want to send a message with the link or send the PDF. You can choose to send it by SMS or through a messaging app.
After you've saved the invoice – go to Money in, scroll down and tap View all invoices. Open the invoice, tap More, tap Share and choose if you want to send a message with the link or send the PDF. You can choose to send it by SMS or through a messaging app.
Troubleshooting
Error: Failed to send email
This error typically happens when you try and send an invoice email, and there’s no email address that’s been added to invoice settings for customers to reply to.
Add an email address in the settings.
Go to Money in and tap settings (⚙) in the top right.
Tap Invoice settings then Invoice emails.
Next to Reply-to email, tap Add.
Enter the email address and tap Save.
Error: Failed to create invoice
One of the main reasons your invoice may have given you the error ‘Failed to create invoice. Please try again.’ is because the GNR tax code was used on an item. GNR is not an applicable tax code for income. You can fix this by creating the invoice again and using another tax code.

How do I record cash sales or income that’s already been paid?
You can record income that you didn't send an invoice for, like when a customer pays in cash or you don't know their details. Go to Money in, tap + and Record income to get started.
If you weren’t paid today, tap the date and choose the new date.
If a customer paid you the money, add them.
Tap Payment category and choose the account you were paid into. If you were paid in cash, tap Cash.
Choose the Income type. If the income is for more than one item, choose Split to add line items.
Choose an Income category. Each category has a tax code, so if you’re GST registered, the right amount of GST will be automatically applied.
Add the amount.
Tap Save.
Why do my invoice emails say they're from 'New Business - Get Started'?
The default name New Business - Get Started is used when you haven’t added a From name in invoice settings. You can change the name to something more meaningful, like your name or your business name:
Go to Money in and tap settings (⚙) in the top right.
Tap Invoice settings then Invoice emails.
Next to From name, tap New Business - Get Started.
Enter the name and tap Save.