Integration Overview
The Integration processes described in this document do not change any data for Clients in GreatSoft or Xero without an action being initiated by an Administrator.
The following considerations must be noted before initiating Update actions:
GreatSoft caches Client data that it retrieves from Xero in the Sync Area and it uses this data to perform matching operations to link a GreatSoft client with a Xero Tax client.
The GreatSoft cache of the Xero Client data must be updated regularly – at least weekly.
Actions to update Client changes to Xero or GreatSoft will affect all the fields for a Client.
NB: An update in either direction will change all the field values for a client in the target app for those fields having a tick in the Update column in the table in Appendix 1.
See Appendix 1 for a detailed list of the Fields that are updated for Clients.
The Xero Tax button will be visible in the GreatSoft Client View when a GreatSoft Client is connected to a Xero Tax Client. This is subject to the security rights of a person.

When the Xero Tax button is clicked the list of returns will be retrieved for the selected Client from Xero. The following button actions are available, subject to valid security credentials for Xero.
Click the Edit button to open the Tax return in Xero.
Click the Xero button to open the Client in Xero.
Click the New Return button to add a new Income Tax return in Xero.
NB: this process does not perform a roll-over unless the return is added directly in Xero Tax.
Getting started
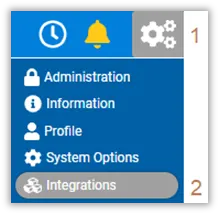
Open the Integrations area by clicking on the Settings Menu access button (1).
Click on the Integrations Menu option to launch this functionality (2).
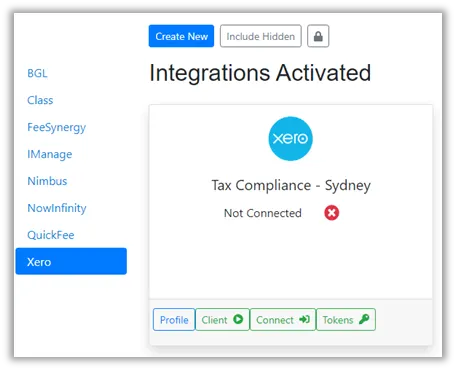
The system will display a list of Integrations that are configured and activated for the firm.
Click on Xero to display the Integration Profiles for Xero.
Multiple Integration Profiles can be configured for a firm. This must be done for each office in GreatSoft.
All available profiles will be displayed if more than one Integration Profile is configured.
Integrations profiles will be configured by or under the supervision of a GreatSoft consultant when needed.
The Profile will show a Connected/Not Connected Status for each Integration profile.
Click the Connect button to surface the Xero Token viewer.
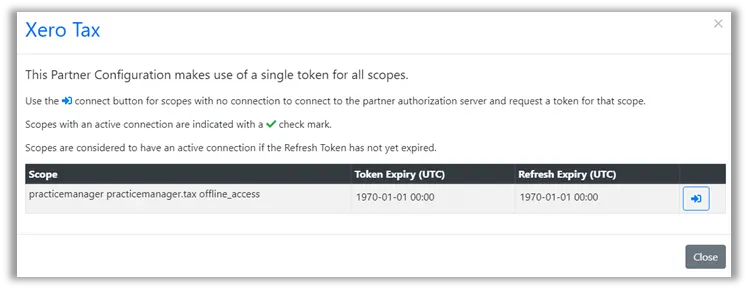
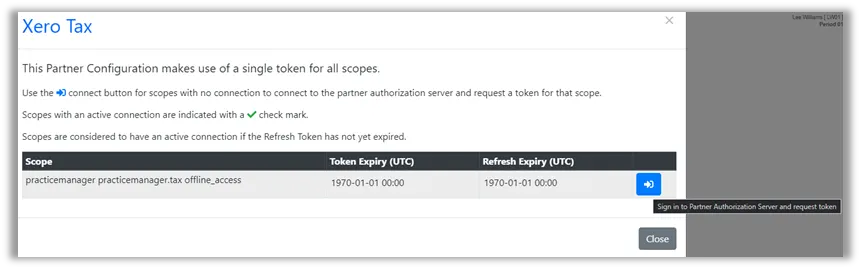
The current token for the profile will display with the scopes used, Token Expiry and Refresh Expiry. If there is no token or a revoked token, the blue connector button will appear.
Click the button to initiate the Consent Flow between GreatSoft and Xero Tax.
GreatSoft will begin its connection to Xero. You will be prompted with the login to Xero screen.
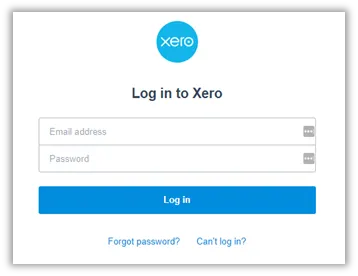
Enter your Username and password to Xero and click Log in.
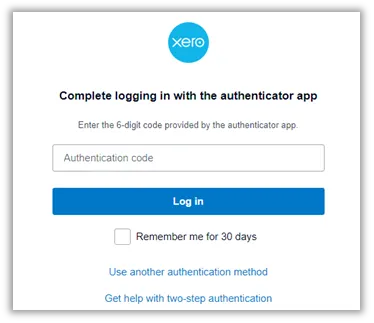
Enter the Authenticator code to pass the Multi-Factor Authentication test.
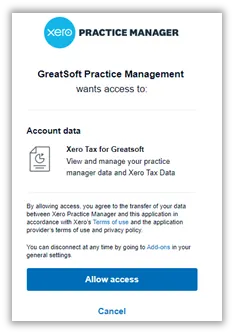
Once you have logged into Xero, Xero will prompt you to allow GreatSoft Access to your Xero Account. Click the Allow Access button.
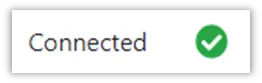
Once you have allowed access, GreatSoft will redirect you back to the Integrations page. The Integration card should now display a green tick and the word Connected if the process completed successfully.
Users also have the ability to remove access for a profile, to do this click the Connect Button
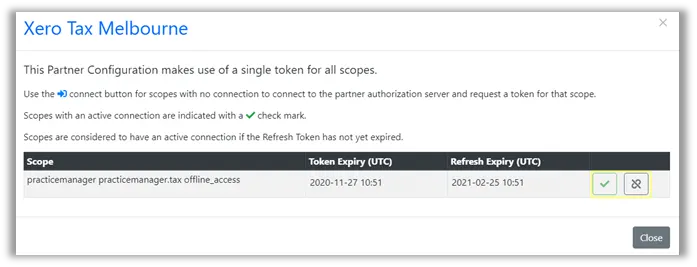
Clicking the Red revoke button will Revoke the current token and disconnect GreatSoft and Xero.
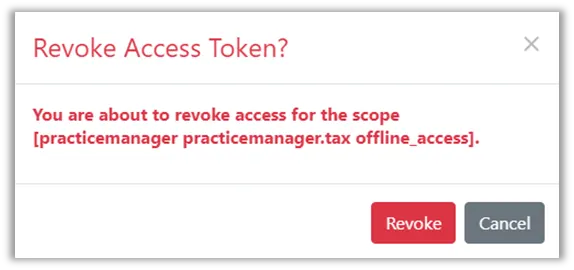
If you revoke the token, you will be required to redo the Connection steps to reconnect GreatSoft and Xero.
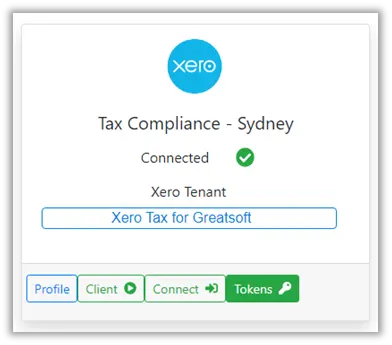
If you have issues with authorizing GreatSoft access to Xero, please contact your Xero Administrator and ask them to give your Account API access permissions. Alternatively please ask a user with Acces rights to connect GreatSoft and Xero.All profile tokens can be viewed by clicking on the Tokens button on the Profile page.
You can now view active, expired and revoked tokens. Flagging the filter box will include Tokens for the filter in the grid below.
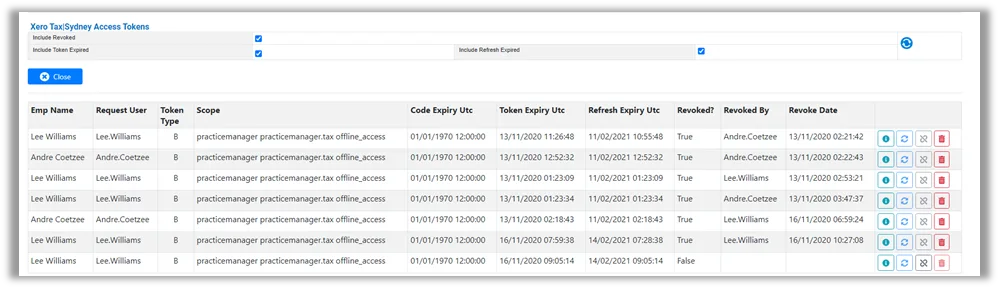
The grid allows actions on each token in the list.

- Show token details. Will pop up the Token information.

- Refresh Token Information.

- Revoke Access Token (Only activated if the token is active).

- Delete Token. This will delete the token from entirely from GreatSoft and remove any history of this token.
Click the close button to navigate back to the Integrations page.

The Integration profiles for Xero tax caters for users who access multiple Xero Accounts (Tenants) with a single login. When accessing the Integration profiles for Xero, each integration card will prompt you that there is no Associated Entity with that profile.
Click the Connect Button and follow the onscreen prompts to set the Integration profile.
After clicking the Associate Entity button, the Associated Entity window will appear for you to complete the assignment of the default Entity for this profile.
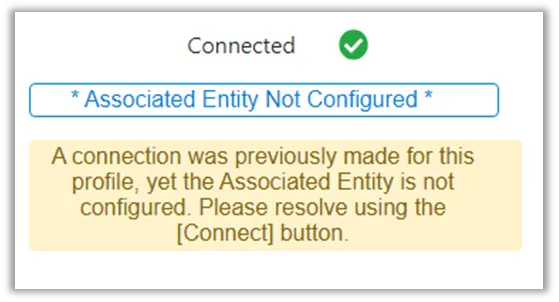
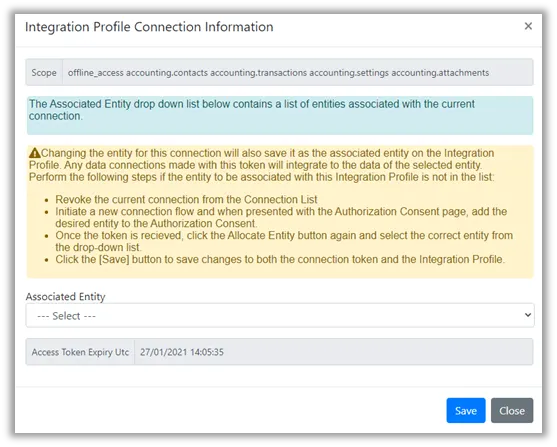
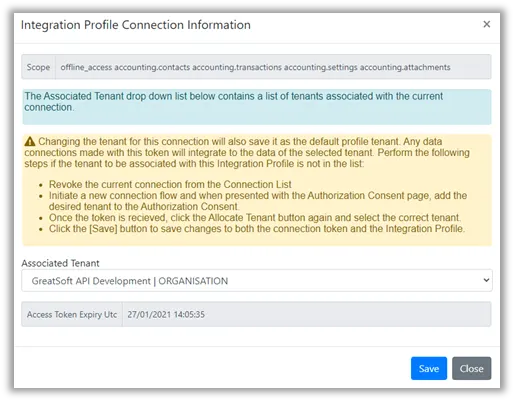


NB: This process only needs to be completed once per Xero Tax Integration profile, once a Tenant is Associated with the profile GreatSoft will know which Tenant to utilize if a user does a Consent Flow process to link GreatSoft and Xero Tax.
Xero Tax Integration
Client Integration
Click on the Client button of a selected Profile to launch the Integration dashboard for Xero.

1. Information bar
The date of the Last Sync will be shown in the information bar. This date will be used as the start date to retrieve a list of clients modified in Xero.
2. Selection Filters
The following filter options are available for the page.
Office – This value will be displayed by default when multiple profiles exist for a particular Integration Type.
Entity Type – Use this selector to filter for a particular type of entity if needed.
Group – Use this selector to filter for a particular Family Group.
Partner – Use this selector to filter for a particular Partner.
Manager – Use this selector to filter for a particular Manager.
Incharge – Use this selector to filter for a particular Incharge.
Search – Use the search box to search for part of a client name, code or TFN.
Status– This selector can be used to display clients for one of the following Statuses
All
Displays a list of Clients that are matched between GreatSoft and Xero. This list also includes Clients not in Xero or Xero clients not in GreatSoft.
Matched
Displays a list of Clients that exist in GreatSoft and that can be matched to a client record in Xero.
New Client for GreatSoft
Displays a list of Clients that exist in Xero but cannot be matched to a client record in GreatSoft.
New Client for Xero
Displays a list of Clients that exist in GreatSoft but cannot be matched to a client record in Xero.
Update to Xero
Displays a list of Clients that are matched between GreatSoft and Xero, but have had changes made in GreatSoft that should be sync’d to Xero.
Specific fields are tracked on the GreatSoft Client record so that when a change is made the status of the row in the Integration profile will reflect as “Update to Xero”. The tracked fields are as follows:
Type Code
Client Code
Client Partner
Client Manager
ACN – Non Individuals only
ABN
Client Tax Flag
BirthDate – Individuals only
Individuals – (Residential Address, Postal)
Other – (Business Address, Postal)
Addresses
Gender
Tax Agent
Prepare Activity Statements
Branch Number
Balance Date
eMail
Telephone
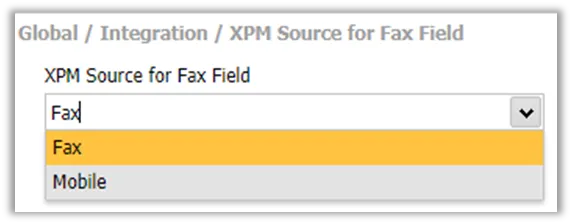
Client Fax/Client Mobile
(This is dependent on the Integration System Options value. “
XPM Source for Fax Field
” located at Global/Integration/XPM Source for Fax Field).
Retrieve full Client list – This checkbox allows for a full client list refresh to be triggered when a Refresh from Xero is performed.
Refresh data list button – This button will reload the displayed list based on the filter selections.

3. Tab Sections
Multiple Tab sections are displayed on the page as determined from the Profile Settings.
Clients – This page will always display and it will show information about Clients.
Contacts – This page will be shown if Contact Sync is enabled.
Groups – This page will be shown if Group Sync is enabled.
History – This page will always display. It will show an audit trail of the Sync actions initiated together with details of Exceptions.
Source – This page will display a list of documents retrieved by the Integration when the Refresh from Xero Action is successfully initiated.
Further explanations are provided below for each of these sections.
4. Action buttons
The action buttons operate independently for each Tab Section:
Clients
This page will display the matching information for Client records. The following button actions are available for Clients:
The Green Profile selector button is available on the Clients Tab. This button can be used to change the selected profile when more than one Profile is implemented.
Refresh from Xero
This process will not update the live information in GreatSoft.
Information that is retrieved from Xero will be saved in the Sync area and is used for the matching reports.
Live information will only be changed by executing a process for one of the Update buttons.
Refresh from Xero action will retrieve a client list from Xero.
The Xero Client list is saved in the GreatSoft Sync area and matching operations are performed to link a GreatSoft client with a Xero Tax client.
See above for information about the fields that are matched.
If Contact Sync is enabled, the Contacts retrieved from Xero will be saved in the Sync area in GreatSoft.
If Group Sync is enabled, the Groups retrieved from Xero will be saved in the Sync area in GreatSoft.
NB: The Refresh from Xero button will be greyed out if there are any records in the “Update to Xero” status. This is to make sure that all data is updated to Xero the Sync process is run.
Update Xero
This action will update Xero Client values using the values from the GreatSoft Client record.
Mark the client records that must be updated by clicking in the Flag checkbox for a row.
This action can be performed for items having a Status of Unmatched Xero or Matched.
When the Location custom field is configured it will be updated for the Client record in Xero with the GreatSoft Office Description linked to the client.
The GreatSoft Partner and Managers will be pushed across to Xero with the update, if these employees are not sync’d with Xero the update will process but an error will be returned. (You can sync employee’s by running the “Refresh Xero Staff” option in the Integration profile, this process is mentioned further in this guide).
Update GreatSoft
This action will update GreatSoft Client values using the values from the Xero Client record.
Mark the client records that must be updated by clicking in the Flag checkbox for a row.
This action can be performed for items having a Status of New Client for GreatSoft or Matched.
Clients Archived in Xero will have the Tax Services flag removed. The client will remain Active in GreatSoft – but without Tax Services enabled.
When Clients are added in GreatSoft various default settings will be applied.
See Appendix 2 for more information about the settings.
When Client Auto-numbers are enabled in GreatSoft, a new Client Code will be generated in GreatSoft and the Xero client record will be updated with the new client code.
The Tax Services flag will be enabled when a client is matched with Xero and if one of the following Xero flags is enabled: Prepare Tax Form or Active ATO Client.
NB: When “Updating Xero” or “Updating GreatSoft”, the full client record will be overwritten by the source. If you are selecting to Update Xero, the Xero record will be overwritten by the GreatSoft Client record and vice versa. Users are cautioned when using this as any data not in the source will be lost if overwritten.
The Integration page action buttons are available based on the business rules detailed below:
When the Integration page finds any clients with pending changes to be sent to Xero, the “Refresh from Xero” button is greyed out no matter the Status selected. This will ensure all pending changes in
GreatSoft are sent to Xero before new data and matching is actioned using the “Refresh from Xero” button.
When the Status is selected as “New Client for GreatSoft”, the individual tick boxes are removed from the grid rows. The tick box on the left-hand side of the row is now made available to flag the row. As the status is set to process clients from Xero to GreatSoft, the
“Update Xero” button is greyed out as this process cannot be actioned.


When the Status is selected as “New Client for Xero”, the individual tick boxes are removed from the grid rows. The tick box on the left-hand side of the row is now made available to flag the row. As the status is set to process clients from GreatSoft to Xero, the “Update GreatSoft” button is greyed out as this process cannot be actioned.



NB: When creating a new client to Xero with an invalid Partner/Manager, Xero will accept the new client creation, but the process will report an error.

Reviewing the error log report will show you which fields were rejected by Xero.

When the Status is selected as “Update Xero”, the individual tick boxes are removed from the grid rows. The tick box on the left-hand side of the row is now made available to flag the row. As the status is set to process changes from GreatSoft to Xero, the “Refresh from Xero” and “Update GreatSoft” buttons are greyed out as these processes cannot be actioned.

When a Matched Clients Tax Flag is unticked, the client should be archived in Xero Tax. The Integration page will show the Client as
“Update Xero” and include the (Archive) wording in the Status on the grid.



NB: When the client is successfully Archived in Xero, the client is removed from the Integration Profile.
When a previously Matched Clients Tax Flag is reactivated, the client should be activated again in Xero. The Integration page will show the Client as “Update Xero” and include the (Restore) wording in the Status on the grid.


NB: When the client is successfully Restored in Xero, the client is shown from the Integration Profile.
When a Matched Client is terminated in GreatSoft, the client should be archived in Xero Tax. The Integration page will show the Client as “Update Xero” and include the (Archive) wording in the Status on the grid.


NB: When the client is successfully Archived in Xero, the client is removed from the Integration Profile.
Refresh Xero Staff
This action will retrieve a list of Staff from Xero.
It will save the Xero Staff list in GreatSoft (Source area) and perform matching operations to link a GreatSoft Employee with a Xero Tax Staff record.
This information is required for updating Partner and Manager values.
This action must be performed when new staff join the firm and are added in GreatSoft and Xero.
Due to security concerns, the staff records are not updated between GreatSoft and Xero.
This process will update the record links for Staff.
When using action buttons that process information between GreatSoft and Xero, GreatSoft will check if the systems are still connected and refresh access. If access fails or has expired, you will be sent through the Xero Consent Flow to connect GreatSoft and Xero.
Report
The reports are designed to assist with validating and extracting information about the field matching for Clients.
The following reports are available:
Client Sync Matching Report – Xero
This report will provide a detailed listing of Client matching errors and it will show the values in GreatSoft and Xero Tax. The filters can be changed to show all Clients.
Client Sync Matching Code Check – Xero
This report will validate and report on matching errors for Client Code, TFN and ABN. The Report has a filter setting that will allow for flagging of mismatched records so that they are pre-selected for updating to Xero Tax.
Close
This action will close the Xero Integration page and return to the Profile selector page.
Client Grid Actions
As a default, one row is shown per client.

The Client grid row has the following actions (as marked with the blue labels):

Expand /

Collapse - This will expand the client row to show the reference number details for a Client.

Remove the Client from the Sync profile. This will remove the Client link from the Sync profile.
Mark the Unmatched row for inclusion in the Update to GreatSoft or Update to Xero action – this applies when records are inserted.
Mark the row for inclusion in the Update to GreatSoft for Matched records.
Mark the row for inclusion in the Update to Xero for Matched records.

Alert indicating missing information for the Client. The row selector is disabled when this alert is shown. The Alert will display for anyone of the following conditions:
Client Code
TFN
ACN
Business Structure

Open the GreatSoft Client Maintenance page.

Open the Xero Client record.


Contacts
Contact Sync is disabled by default. The reason for this is that Xero creates more than one contact record for a person if that person is linked to more than one Tax Client.
The Xero Contact Sync data is refreshed when a Client Refresh is performed.
Contacts are matched using the Email address.
Ensure that contact email addresses are not used for different people.
The following actions are available when Contact Sync is enabled:
Update Xero
This action will update Xero Contact values using the values from the GreatSoft Tax Contact record.
Mark the Contact records that must be updated by clicking in the Flag checkbox for a row.
This action can be performed for items having a Status of Unmatched Xero or Matched.
Update GreatSoft
This action will update GreatSoft Contact values using the values from the Xero Contact record.
Mark the Contact records that must be updated by clicking in the
Flag checkbox for a row.
This action can be performed for items having a Status of Unmatched GreatSoft or Matched.
When using action buttons that process information between GreatSoft and Xero, GreatSoft will check if the systems are still connected and refresh access. If access fails or has expired, you will be sent through the Xero Consent Flow to connect GreatSoft and Xero.Report
The reports are designed to assist with validating and extracting information about the field matching for Contacts.
The following reports are available:
Contact Sync Matching Report – Xero
This report will provide a listing of Contact matching errors and it will show the values in GreatSoft and Xero Tax.
Groups
Group Sync is disabled by default. The reason for this is that Xero creates allows Free type of the Group list.
The Xero Group Sync data is refreshed when a Client Refresh is performed.
The following actions are available when Group Sync is enabled:
Update Xero
This action will update Xero Group values using the values from the GreatSoft Tax Group record.
Mark the Group records that must be updated by clicking in the Flag checkbox for a row.
This action can be performed for items having a Status of
Unmatched Xero or Matched.
Update GreatSoft
This action will update GreatSoft Group values using the values from the Xero Group record.
Mark the Group records that must be updated by clicking in the Flag checkbox for a row.
This action can be performed for items having a Status of
Unmatched GreatSoft or Matched.
When using action buttons that process information between GreatSoft and Xero, GreatSoft will check if the systems are still connected and refresh access. If access fails or has expired, you will be sent through the Xero Consent Flow to connect GreatSoft and Xero.
History
This page provides a log of the actions that are executed and it allows for exception reports to be viewed for a process.

The History grid identifies the following information:
The Process that are executed.
Date of the action.
Username of the person that executed the process.
Record error count.
The following actions are available:
View
This action will display a list of reports showing exceptions that are logged for a process or rows successfully actioned for a process.
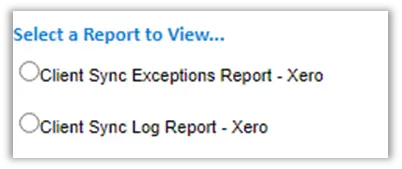

Source
This page provides access to the source files retrieved for the Refresh from Xero process.

The source files, saved in XML format contain the original information retrieved from Xero when the Refresh from Xero process is executed.
The following actions are available:
File Name hyperlink - This action will open the file download button allowing the source file to be saved.
Delete - This action will delete the Source row.
Appendix 1 – Client fields updated between GreatSoft and Xero Tax
Object | Xero Fields | GS Field | Xero status | GS Status | Update |
Client | Client.Email | optional | optional | P | |
Client | PostalAddress | AddressDetail.Address1 (ADPOS) | optional | optional | P |
Client | PostalCity | AddressDetail.Town (ADPOS) | optional | optional | P |
Client | PostalRegion | AddressDetail.Region (ADPOS) | optional | optional | P |
Client | PostalPostCode | AddressDetail.PostCode (ADPOS) | optional | optional | P |
Client | PostalCountry | AddressDetail.Country (ADPOS) | optional | optional | P |
Client | Phone | Client.ClientTel | optional | optional | P |
Client | Fax System Option to allow GS Mobile number to be saved to Xero Fax. | Client.ClientFax or ClientCell This field is only updated from GS to Xero and it is based on the System Option for XPM Source for Fax Field. | optional | optional | P |
Client | WebSite | Client.ClientURL | optional | optional | P |
Client | ReferralSource | optional | not available | ||
Client | ExportCode | Client.ClientCode | optional | mandatory | P |
Client | IsProspect | optional | ignored | | |
Client | IsArchived | Client.ClientTaxFlag | optional | optional | P |
Client | IsDeleted | Client.ClientDateTerminated | optional | optional | P |
Client | AccountManagerID | Client.ClientPartner | optional | mandatory | P |
Client | BillingClientID This field is updated from GS to Xero only. | Client.BillClient This field is ignored for update to GS. | optional | optional | P |
Client | PrepareActivityStatement | Updated to Client.ClientTaxFlag | optional Yes/No | optional | P |
Client | PrepareTaxReturn | Client.ClientTaxFlag | optional Yes/No | optional | P |
Client | ActiveAtoClient | optional Yes/No | ignored | | |
Client | TaxNumber | Client.ClientTaxNumber | optional | optional | P |
Client | SignedTaxAuthority | optional Yes/No | ignored | | |
Client | TaxAgent | Client.RecCode (Tax Office) | optional | mandatory | P |
The following fields are only applicable if the Practice Management module is enabled | |||||
Client | JobManagerID | Client.ClientManager | optional | mandatory | P |
Client | CompanyNumber | Client.ClientIDNumber | optional | optional | P |
Client | BusinessNumber | Client.ClientTaxVat | optional | optional | P |
Client | BusinessStructure | Client.TypeCode | optional | mandatory | P |
Company | CO – Company | Business structure mapping to Type | P | ||
Individual | IN – Individual | Business structure mapping to Type | |||
Partnership | PS – Partnership | Business structure mapping to Type | P | ||
Sole Trader | ST – Sole Trader | Business structure mapping to Type | P | ||
Superannuation Fund | SMSF – Self Managed Superfund | Business structure mapping to Type Tax for these clients are usually handled in a Superfund app. | P | ||
Trust | TR - Trusts | Business structure mapping to Type | P | ||
Client | BalanceMonth | optional Jan=1, Feb=2, etc | not available | ||
Client | GSTRegistered | optional Yes/No | not available | ||
Client | PrepareGST | optional Yes/No | not available | ||
Client | GSTPeriod | optional 1,2,6 | not available | ||
Client | GSTBasis | optional | not available | ||
Client | ProvisionalTaxBasis | optional | not available | ||
Client | ProvisionalTaxRatio | optional | not available | ||
For Organisations only | |||||
Client | Name | Client.ClientSurname | mandatory | mandatory | P |
Client | Address | AddressDetail.Address1 (ADBUS) | optional | optional | P |
Client | City | AddressDetail.Town (ADBUS) | optional | optional | P |
Client | Region | AddressDetail.Region (ADBUS) | optional | optional | P |
Client | PostCode | AddressDetail.PostCode (ADBUS) | optional | optional | P |
Client | Country | AddressDetail.Country (ADBUS) | optional | optional | P |
For Individuals only | |||||
Client | Name (Full Name) | Individuals only optional | ignored | | |
Client | FirstName | Client.ClientName | Individuals only optional | mandatory for Individuals | P |
Client | LastName | Client.ClientSurname | Individuals only optional | mandatory for Individuals | P |
Client | OtherName | Merged into Client.ClientName | Individuals only optional | not available | P |
Client | Title | Client.ClientTitle | Individuals only optional | optional | P |
Client | Gender | Client.Gender | Individuals only optional | optional | P |
Client | DateOfBirth | Client.ClientBirthDate | Individuals only optional | optional | P |
Client | Address | AddressDetail.Address1 (ADPHY) | optional | optional | P |
Client | City | AddressDetail.Town (ADPHY) | optional | optional | P |
Client | Region | AddressDetail.Region (ADPHY) | optional | optional | P |
Client | PostCode | AddressDetail.PostCode (ADPHY) | optional | optional | P |
Client | Country | AddressDetail.Country (ADPHY) | optional | optional | P |
All Clients for sites where configured | | ||||
Custom | Office Location | Office.OfficeDescription | optional | mandatory | P |
Appendix 2 – Contact fields updated between GreatSoft and Xero Tax
Object | Xero Fields | GS Field | Xero status | GS Status | Update |
Contact | Surname | ContSurname | optional | optional | P |
Contact | Firstname | ContFirstname | optional | optional | P |
Contact | Addressee | optional | Ignored | ||
Contact | ContEmail | optional | optional | P | |
Contact | Mobile | ContCell | optional | optional | P |
Contact | Phone | ContTel | optional | optional | P |
Contact | Position | ContDesig | optional | optional | P |
Appendix 3 – Client Group fields updated between GreatSoft and Xero Tax
Object | Xero Fields | GS Field | Xero status | GS Status | Update |
Group | Groupname | GroupDesc | optional | optional | P |
Appendix 2 – Default Settings to be configured for Client Additions to GreatSoft
The following system options must be configured for each office that is linked to a Xero Integration Profile:
Name | ||
1 | XPM Default Office | Needed when more than one office is configured. |
2 | XPM Default Partner | The Client Partner is mandatory when adding a new client in GreatSoft. The person selected here will be applied for new clients. |
3 | XPM Default Manager | The Client Manager is mandatory when adding a new client in GreatSoft. The person selected here will be applied for new clients. |
4 | XPM Default In-Charge | The Client Incharge is mandatory when adding a new client in GreatSoft. The person selected here will be applied for new clients. |
5 | XPM Default Tax Contact Type | Usually Tax Contact. |
6 | XPM Source for Fax Field | Option is available to apply the GreatSoft Mobile number into the Xero Fax field. |
6 | CRM Default Group This setting is system-wide and used by various other processes. | The Client Group is mandatory when adding a new client in GreatSoft. |
7 | Xero Custom Fieldname – Location Optional field only needed when more that one office is configured. | Only needed when advised by a GS Consultant. |
This information is used when clients are added to GreatSoft (from Xero) when the Update GreatSoft process is executed.