Add and edit assets that need to be integrated into the tax return from the Assets tab.
Before adding an asset, you must create an asset class. This is a mandatory field when creating an asset.
Set up an asset class
Before adding assets, you have to set up an asset class. This step is crucial since you'll be allocating your assets by class in your tax return.
Add an asset
Click Add asset in the top-right corner.
The Asset class is a mandatory field. Make sure you've created an asset class before creating an asset.
Add a Prefix and Number to give your asset a code. The next time you add an asset to the same asset class, the code will be auto-generated (you're welcome!).
Click + Add more details to see other optional fields (location, serial number, insurer, premium due date, premium amount, and insured value).
Click Add asset.
Move an asset to a different asset class
Follow the steps below if you create a new asset class and need to move some assets into it.
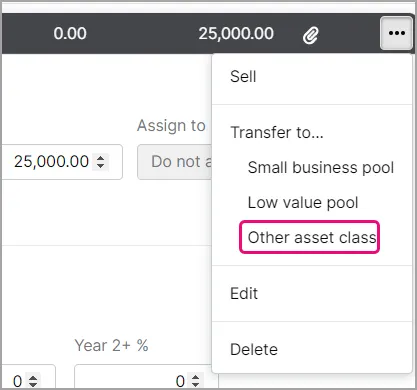
In the Assets tab, click the ellipses at the end of the asset.
Select Other Asset Class.

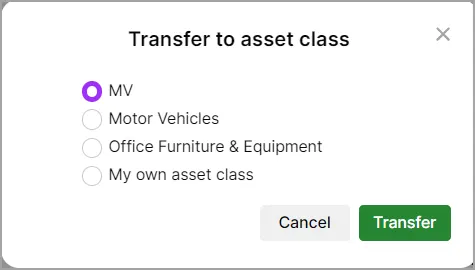
In the Transfer to Asset class window, select the asset class.

Edit an asset
You can edit an asset that is created within the current year or rolled forward from a prior year.
Click an asset row to expand the details, then make your changes.
Click Save.
Some things to remember when editing an asset
If you change an asset, depreciation may be re-calculated for the current year and subsequent years.
While an asset is open for editing, you can't delete, move, transfer, or sell the asset.